
I didn’t realize how distracting my Windows desktop had become until I started paying attention to my own habits. Every morning, I would turn on my PC and see rows of icons waiting for me. Screenshots from old projects sat beside documents I still needed. Downloaded files were mixed with shortcuts, folders, and random installers. Instead of helping me get started, the desktop often became the first thing I had to deal with.
I decided to change that by trying iTop Easy Desktop. My goal wasn’t to build a perfect-looking workspace. I simply wanted fewer things competing for my attention when I sat down to work. After setting it up, I found that the biggest difference came from giving my files a proper place and removing unnecessary visual noise.
Why I Wanted a Quieter Desktop?
My main problem was not only that I couldn’t find my files. I eventually could. The problem was the constant visual clutter.
When I opened my computer to work on any project, I could see screenshots, PDFs, browser downloads, folders, and application shortcuts all at once. It made the desktop feel busy before I had even started working.
I also noticed another problem during screen sharing. If I needed to show someone something on my computer, I first had to close windows or move things around so the other person would not see the mess behind them. That was enough motivation for me to try a desktop organizer.
The Features That Made the Biggest Difference
Here are the features of iTop Easy Desktop that I feel are worth-trying.
One-Click Auto-Organization
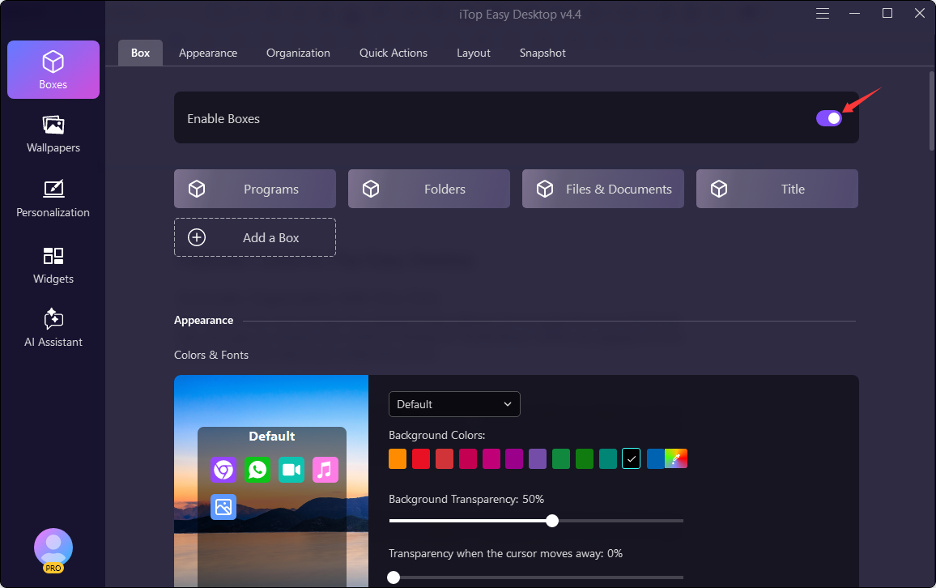
I started with the feature that required the least effort is one-click organization.
Instead of dragging every icon myself, I let iTop Easy Desktop group my existing desktop items into categories such as documents, images, applications, and folders. It wasn’t my final layout, but it immediately reduced the visual mess.
Custom Desktop Boxes
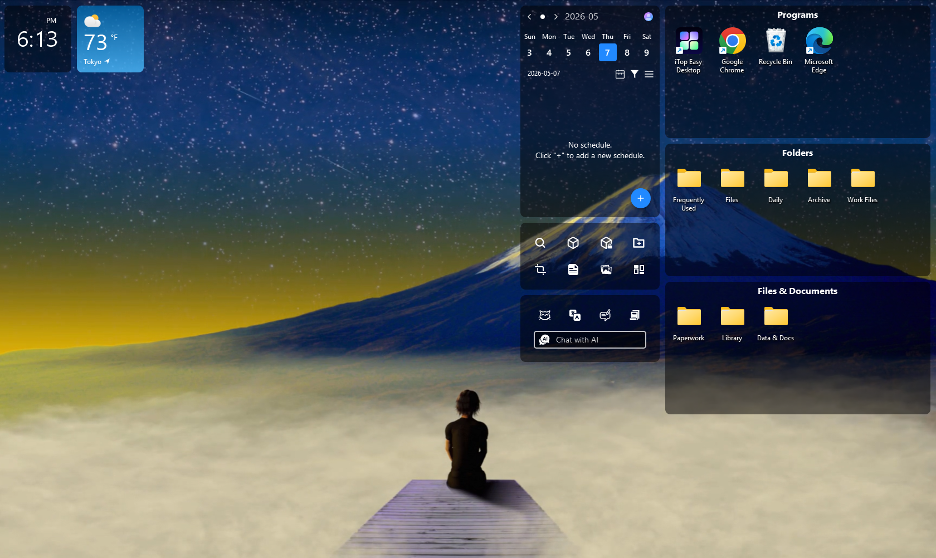
After the automatic sorting, I created boxes based on how I actually work. I made sections for current projects, screenshots, downloads, and frequently used tools. The software allows users to create their own boxes and use separate areas for work, gaming, or personal activities.
This was more useful to me than simply sorting files alphabetically. I could see the things related to my current task without having unrelated icons spread around them.
Quick Search and Folder Portal
I also stopped relying on my memory to find files. The built-in search lets me type the name of a file or folder instead of scanning the desktop manually. Folder Portal goes a step further by letting me access the contents of a selected folder directly from the desktop.
For folders I open frequently, that saved me from repeatedly navigating through File Explorer.
Double-Click Hide
This became my favorite feature for meetings. When I needed to share my screen, I could double-click the desktop and hide the boxes. The files weren’t deleted or moved; they were simply out of sight. A second double-click brought the workspace back. iTop lists this feature specifically as a quick way to create a clean desktop during screen sharing.
That small change made my workspace feel much calmer during presentations.
Auto Save Layouts
I didn’t want to spend time arranging everything only to lose the setup later. Auto Save Layouts provides a snapshot-style backup of the desktop arrangement, allowing me to return to a preferred layout.
This was helpful because my workspace changed from day to day. I could experiment with a different arrangement without worrying about losing my usual setup.
PawPal Virtual Desktop Pet
I also tried PawPal, the virtual desktop pet included with iTop Easy Desktop. It runs quietly in the background with smooth animations, adding a friendly touch to my workspace without getting in the way of my work.
The current character selection focuses on cute cat companions, while more options are planned for future updates.
How I Set Up My Less Distracting Workspace?
The setup took only a few basic steps.
Install iTop Easy Desktop
I downloaded and installed the software on my Windows PC. The official site describes the installation as quick and straightforward.
Run Auto-Organization
Once the program was running, I used the auto-organization feature to sort the existing icons. This gave me a clean starting point instead of asking me to organize everything manually.
Create Boxes Around My Work
I then created a few custom boxes based on my daily tasks.
I kept them simple. Too many categories would have defeated the purpose, so I used only the sections I actually needed.
Hide the Workspace When I Need Focus
For writing sessions, I kept only the files related to my current work visible. Before meetings or screen recordings, I used Double-Click Hide to remove the boxes from view. This gave me a clean screen without requiring another cleanup session.
Final Thoughts
After using iTop Easy Desktop, I stopped thinking of my desktop as a storage space and started treating it more like a workspace. It is a great desktop organizer software that helped me remove distractions without constantly moving files around.
For me, a less distracting desktop wasn’t about making everything look perfect. It was about seeing fewer things when I needed to focus.